🚨 Sentinel for Xcode


Because of my last article and after some feedback (thanks @mattie) I decided to start Sentinel for Xcode
Why?? my previous approach was 100% pure shell script, which btw it’s not simple to read, so since this is for Xcode, so let’s do with swift 🚀.
The project is public (github.com/ruiaureliano/Sentinel), feel free to try and comment 💪. There are two projects, Sentinel itself and a Sample project to test.
1) Download or Build Sentinel
You need to download the release or build the project itself, up to you
2) Installation
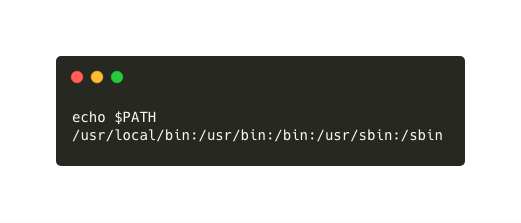
- Open terminal and check your path
- Move sentinel to one of those directories, for instance
/usr/local/bin - Drag sentinel to that folder, you may need to type your password
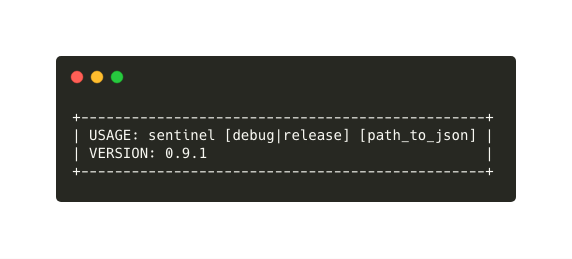
- Close and reopen terminal and type this command: sentinel if you see the following message, that's all 💪.
3) Xcode Integration
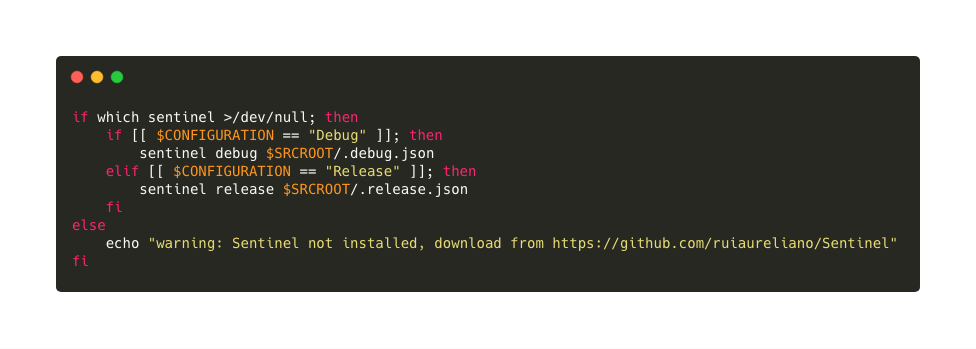
Open Xcode project, navigate to Targets ► Build Phases, create a new Run Script Phase and enter this:
Sentinel uses a JSON file with the rules for show warnings and errors, this particular file we use two separated JSONs, one for debug and one for release
Each JSON must be like this:
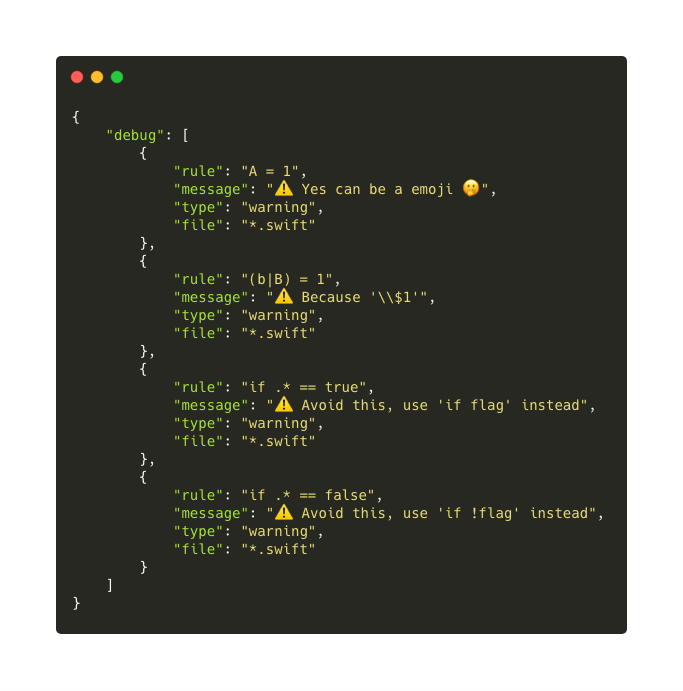
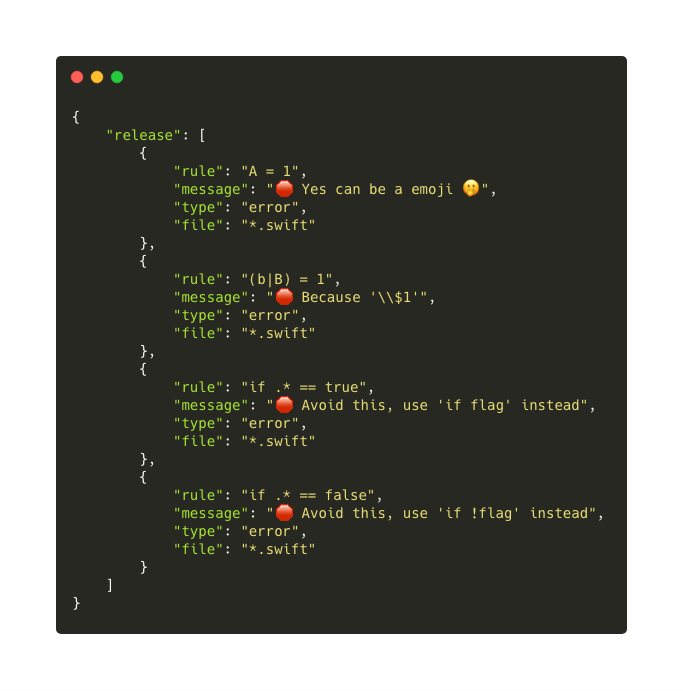
The main key must be debug or release and the value is an array of dictionaries, where each one must have these keys: rule, message, type, file
Explaining JSON rules
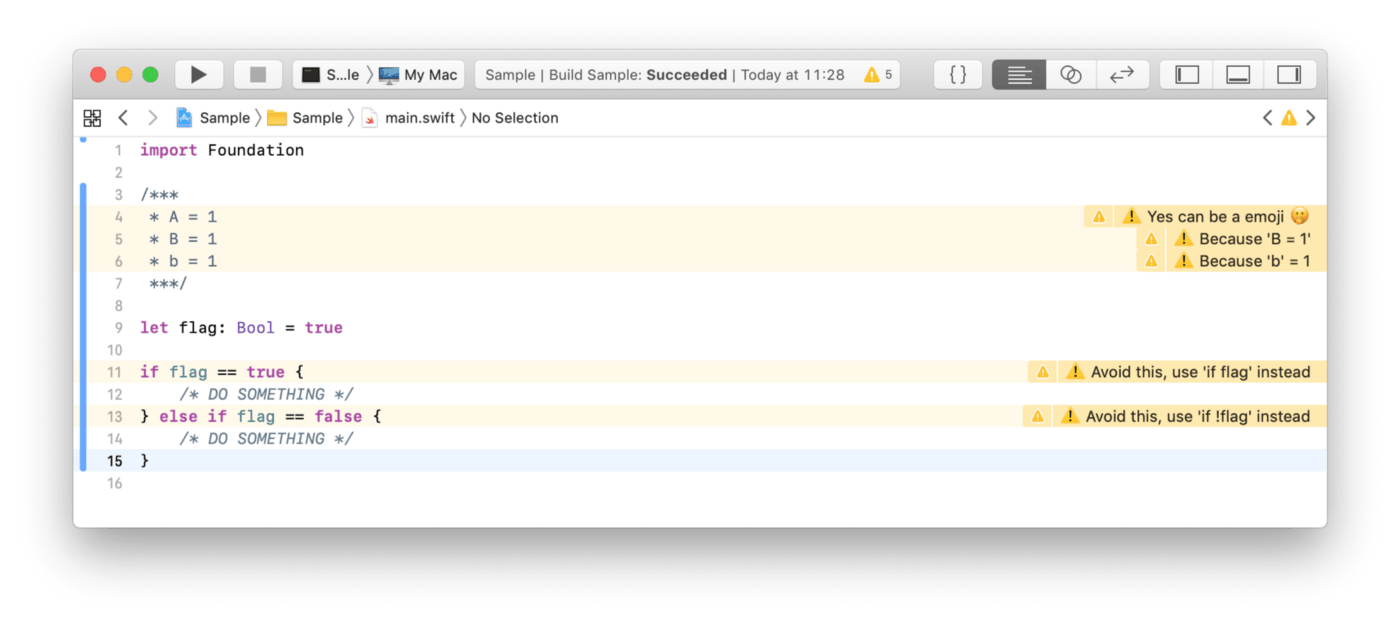
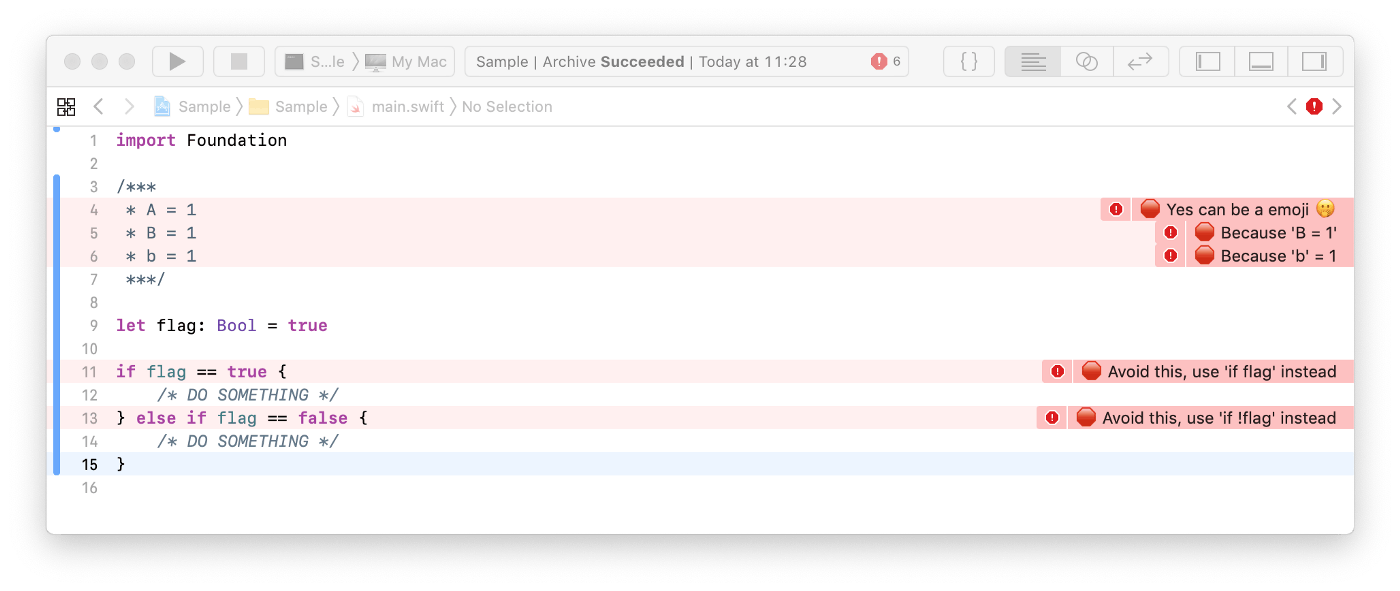
The difference between .debug.json and .release.json is just the way we display messages, warnings, and errors
a) 1st rule is “A = 1” and we show a simple message “⚠️ Yes can be an emoji 🤭”
b) 2nd rule “b|B = 1” will trigger a message if “b=1” or “B=1” we display this message “⚠️ Because ‘\\$1’”
c) 3rd rule “if .* == true {” this rule explain how to use regular expressions, in this case we don’t want to compare a flag with a bool, instead just use “if flag”, not if “flag == true”
d) 4th rule, same as c) but for false
Output
Thanks, please share if you think this is awesome 🧐